 | |
| Fuel Mods |
MORE AIR REQUIRES MORE FUEL - With the supercharger pumping as much as 10 psi. it is clear that a lot of additional fuel is going to be needed to avoid lean-burn detonation. This was effected by increasing the fuel delivery, removing any uncontrolled constriction in the fuel line (stock FPR) and managing the rate of flow with an adjustable fuel pressure regulator. |
||||
|
|
||||
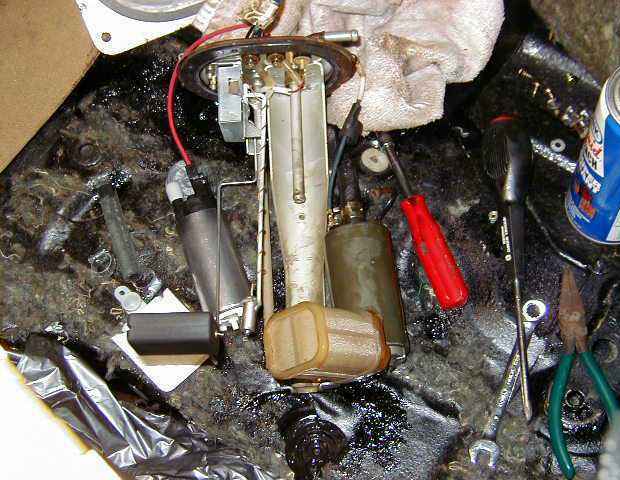 It's always a good idea to cover the hole in the tank while you're shuffling little nuts and bolts around. At this time I took the liberty of bending the wire between the fuel level sender and the float to improve the accuracy of the cockpit gauge (it used to read 7/8 full at fill up and there would be almost half a tank by the time the gauge read 1/4 - this fixed it - a more acute angle = lower reading on the gauge). I used the new Walbro filter (though the stock one looks to be more substantial) assuming that Walbro knows what they're doing. Time will tell).
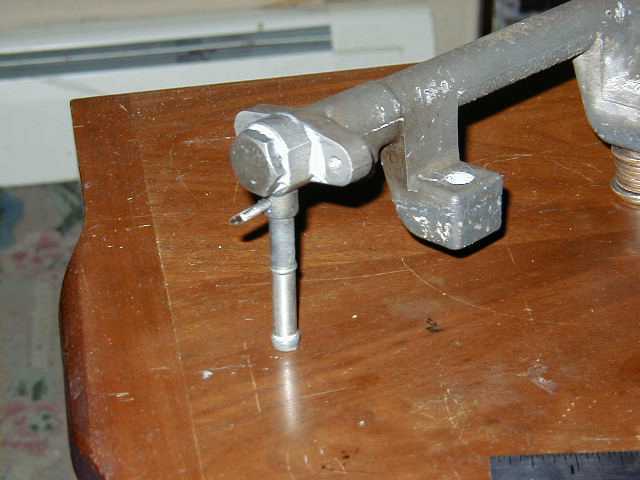 The secondary fuel rail normally houses the stock fuel pressure regulator (above left) but with the Walbro there is a real likelihood that the increased flow could overcome the stock regulator and cause an UNPLANNED rise in pressure. If you are VERY lucky you can get a friend to machine a replacement for the stock FPR which will bolt on to the stock location (thanks Travis). If you aren't so lucky, you can remove the stock FPR and drill / tap the rail (M12 x 1.50) and then screw in a banjo bolt and hose barb - sealing the entire end of the rail (threads and banjo head / shoulders) with JB Weld. 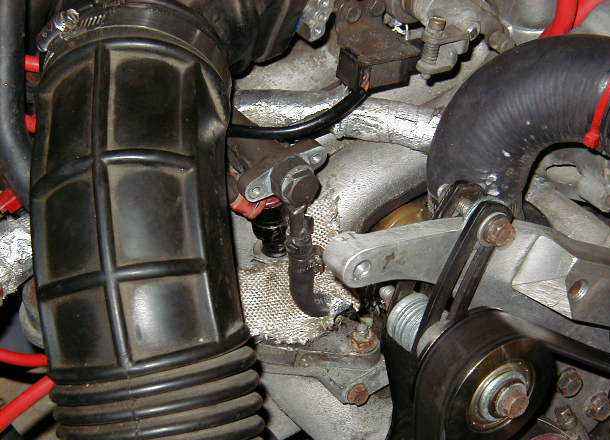 The modified fuel rail is slightly shorter than the stock one (since there is no longer a FPR bolted to the end) and will provide a little space for the supercharger. The old system left the stock FPR up against the rear of the SC - transferring heat and vibration. | ||||
This is the excellent Vortech Fuel Management Unit which replaced the inadequate Paxton FPR which came with the supercharger kit. This device allows for complete fuel delivery adjustment (static fuel pressure, rate of rise and maximum fuel pressure) by removing the front cover and replacing a spring and / or spacers and disks. Beside it is an Auto Specialties 3.75" SC pulley (the correct size to keep the SC from overspinning ).
Here are the spacer rings and disks used to set rate of rise. In the baggie at the rear are a short spring and a restrictor which goes in the vacuum line between the SFMU and throttle body. The rate of rise is determined by the spring size and disk / ring sizes selected for installation inside the unit. The dry-side of the unit is easily opened with a 5/32 allen and parts swap is straight forward. It is a little tricky sealing the unit back up if you elect to use the long spring as I did. |
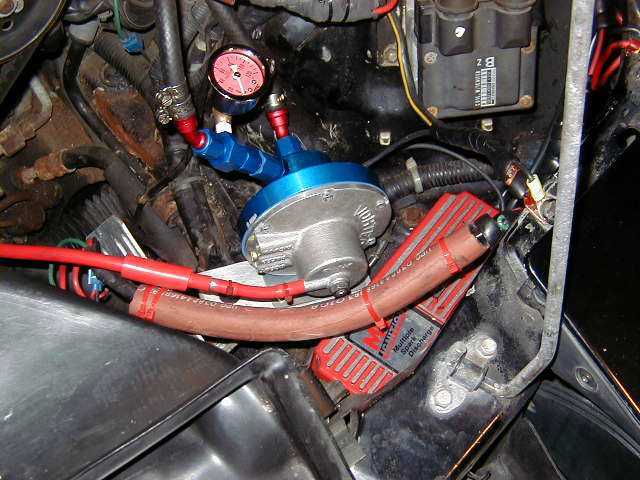
Utilizing -6 AN fittings (Aeroquip) it was easy to plumb in a fuel pressure gauge and hose barbs. The static pressure is set via an external set screw / jam nut.
