| Supercharger (this page sometimes loads slowly - hang in there) |
 |
|
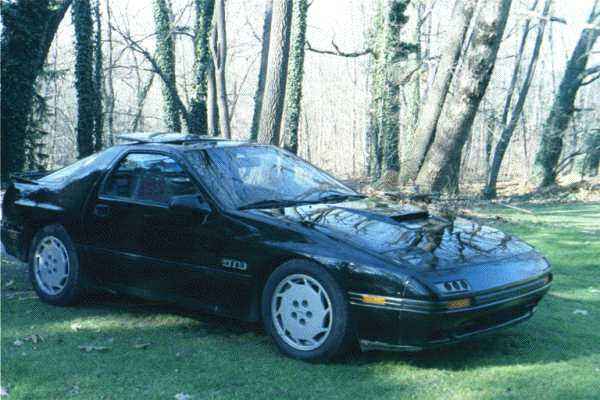
Pictures and brief comments regarding the installation of the Paxton-Nelson SN-2000 supercharger The Paxton-Nelson kit is generally complete with the Paxton SN-89/2000 supercharger, Paxton BDFPR, trick thermostat housing, chrome upper radiator tube and hoses, intake hoses, clamps, etc. Regrettably, the seller (Design Energy / Mariah Motorsports) really doesn't know a great deal about the subcomponents and they have recently sent out kits which contain incorrectly sized supercharger pullies, poor quality brackets and malfunctioning fuel pressure regulators. In retrospect, this kit (if you have the very bad fortune to receive one with the wrong or poor quality pieces) is under-engineered and over-priced. Installing the kit as it is sold (with the wrong size pulley, malfunctioning fuel pressure regulator and poorly cast bracket) will almost certainly cause premature supercharger failure (ask me how I know this). On top of this, neither Design Energy nor Paxton are very eager to honor their warranties. It took me three months to get my SC repaired - the failure due to Nelson design / component errors. Overall, this kit is NOT recommended. If you want the performance either buy a TII and upgrade from there or look at a custom SC from another (ANY OTHER) supplier. That said, on to the installation. |
||

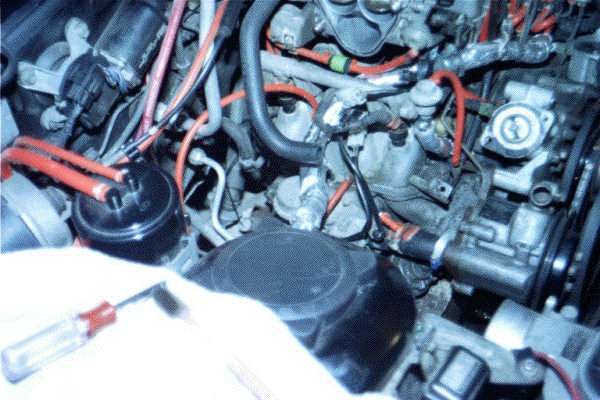
Once parts are inventoried, one must do a little prep work to facilitate installation. Prior to supercharger insertion, one must remove the cold-start injector assy., JB weld the openings and reroute the wiring harness beneath the secondary fuel rail to allow clearance for the SC. This is a good time to clean the secondaries (Marren or RC are decent - not good, but decent) or upgrade them to 550 cc. as I did. Take care with the wiring as it is old and quite brittle - the last thing you need is a short internal to the harness. The serpentine belt pullies are brittle alloy and will be damaged if dropped - they're expensive to replace. Fully tighten the alternator pulley with an impact wrench. If left under-torqued it can twist and WILL eat the hole out of the aluminum pulley. This is guaranteed to happen in some remote location late at night. This failure takes out the water pump at the same time and renders you PARKED. Also be CERTAIN that you are using a SC pulley at least 3.75" diameter. The supplied 3.25" pulley will overspin the Paxton SN 89 / SN 2000 supercharger causing complete and dramatic failure. The thermostat housing is trick with a sunken allen head bolt. It can be mounted either way, so be careful of your orientation before RTVing it in place wrong. Use care not to get any RTV in the thermostat. The boost dependant fuel pressure regulator is critical to the function of the SC but the Paxton unit in the "kit" was not adjustable and generally inadequate. The Vortech Super Fuel Management Unit (which is excellent) replaces the Paxton directly. I wanted the FPR location to be accessible so I relocated the battery to the passenger bin and freed up space for the BDFPR there. Such remote locations will require MUCH hose/tubing - initially I used 7' of 5/16" fuel injector hose and 5' of silicone hose (boost pressure). Once I had the car on a dyno, however, I found that there was a delay between calling for boost and when the BDFPR actually cut off the return gas line (shown by a LEAN condition momentarily). I rerouted the boost line using thick wall / small diameter hose and cut the length from 5' to 18" - which eliminated the delay. Use care in connecting fuel FROM the engine and the line TO the tank. Don't reverse them. As mentioned, I have relocated a sealed battery (Optima Red) in the bin behind the passenger. 2 ga. cable was routed beneath the carpet to a bunkhead pass-through terminal and from there to the original wiring in the engine bay. A 200a. audio fuse is inline near the battery for short insurance ( high amperage cables around sheet metal is a potential Oh, Oh). Secure the battery/baseplate to the frame and confirm you have a GOOD ground. Some folks have kidded me about having a fire extinguisher in a street car however, this one saved a TII from a firey grave. HIGHLY RECOMMENDED. Safe is smart when you think about fuel pulsation dampers and subsequent gas/engine fires. BTW, the nylon cargo net strung between the towers is very useful keeping loose missiles aft of the pilot during high-g manuvers. The entire SC install extended over a period of weeks (waiting for one thing or another . . . the SC took a month) but was straight forward once everything was available. NOTE: Be sure the lable on the SC is facing straight up since the ATF pickup is on the bottom of the SC housing and an angled SC might develop lube starvation. Alignment of the serpentine belt/pullies is also critical as the slightest out-of-plane condition will quickly eat up a belt. The belt (6 rib) must be TIGHT TIGHT TIGHT to hold any boost over 6 psi. without slipping. I sometimes boost 10psi but to do so I need the belt to be like a guitar string. A prudent addition, in concert with the SC, is instrumentation to monitor the presurized induction. I use an Autometer "A" pillar dual pod, an Intellitronix A/F gauge and a VDO 0-15 psi boost gauge. Since "lean" is a killer this is the absolute minimum. With my ported/modded rebuild I also added an EGT and A'pexi S-AFC. More insurance. |
||

|
|---|